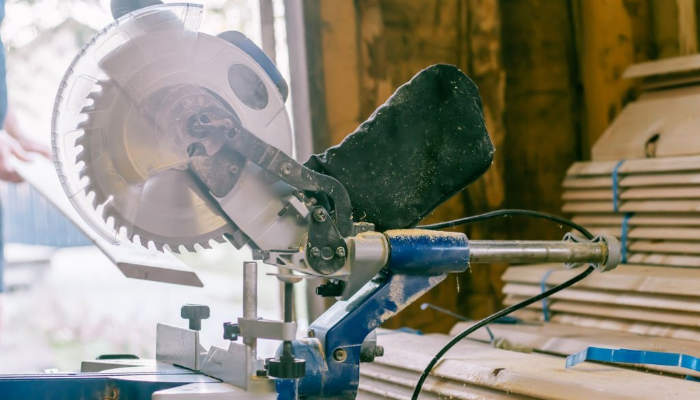
Miter saws are powerful tools that can make precise cuts of wood and other materials. However, some people have wondered if this kind of saw can cut through metal.
A fixed, extremely specialized tool called a miter, sawing saw for wood and metal, or angle cutter is used to raw materials at a specific angle. A rotating platform and a moveable workspace with a disc above the bed provide this option. Slats, bars, and planks are examples of narrow timber goods that a miter saw can handle.
Cutting metal can be a tricky job if you don’t know what you’re doing. If you’re just starting out in your hobby, you might not want to invest a lot of money in a power tool that won’t help you achieve the same results as a manual method. In this article, we’ll show you exactly how to use a miter saw for cutting metal.
Is it possible to cut metal with a miter saw?
Yes, to answer briefly. If you have a good blade and a reliable miter saw engine, you can also handle a number of small home improvement or repair chores involving metalwork. In particular, a miter saw can be used to cut:
Aluminum flashing
Function: Used to make drip caps for windows and doors or to line the perimeter of a roof (at the eaves).
Brass strips
Function: Used as an ornamental trim on furniture or cabinets.
Angle iron
Function: Used in construction to reinforce framing, or as support braces for shelves and structures.
Eaves trough
Function: Used to direct water runoff from a roof.
Reinforcing bar (rebar)
Function: Used in concrete construction to reinforce poured walls, floors, and ceilings.
You can cut metal with a miter saw, but there are a few things you need to know before you get started. First, you’ll need to choose the right blade. Second, you’ll need to take some safety precautions. Let’s take a closer look at each of these topics.
Choosing the Right Blade
When it comes to cutting metal, the main thing you need to know is that there are two different types of blades: those for ferrous metals and those for non-ferrous metals. Ferrous metals contain iron and are attracted to magnets. Non-ferrous metals, such as aluminum, brass, and copper, don’t contain iron and are not attracted to magnets.
You’ll need to use a different blade depending on the type of metal you’re trying to cut. If you use a blade designed for ferrous metals on non-ferrous metal, it will quickly become dull. Likewise, if you use a blade designed for non-ferrous metals on ferrous metal, the blade will overheat and could break.
When choosing a blade, you also need to consider the thickness of the metal you’ll be cutting. If you’re working with thin sheet metal, you can use a standard wood-cutting blade. However, if you’re dealing with thicker metal, such as angle iron or steel pipe, you’ll need a blade specifically designed for cutting metal. These blades have more teeth and are made of tougher materials, such as carbide or high-speed steel.
Installing the Blade
Once you’ve chosen the right blade, it’s time to install it on your miter saw. If you’re not familiar with this process, don’t worry it’s easy. Start by disconnecting the power to your saw. Then, use the wrench that came with your saw to remove the blade guard. Next, loosen the arbor nut that holds the blade in place. You should be able to do this by hand.
Once the arbor nut is loose, you can remove the old blade and install the new one. Be sure to line up the teeth of the blade with the teeth of the arbor. Then, tighten the arbor nut by hand. Once it’s tight, you can use the wrench to give it an extra turn or two.
Now that the blade is installed, you can reattach the blade guard. Make sure the guard is securely in place before you turn on the power to your saw.
Safety Precautions
Whenever you’re working with power tools, it’s important to take safety precautions. This is especially true when working with a miter saw, as there’s a risk of kickback if the blade binds.
- When using a miter saw, always wear eye protection. A pair of safety glasses or goggles will do the trick.
- It’s also a good idea to wear gloves when handling a miter saw. This will protect your hands in case the blade slips.
- In addition, be sure to keep your fingers away from the blade. You should also avoid wearing loose clothing or jewelry that could get caught in the blade.
- Finally, make sure the area around your work area is clear. This will help you avoid tripping over things or knocking into something and causing the saw to fall.
How to Cut Metal: Step-by-Step Guide
Now that you know the basics of cutting metal with a miter saw, let’s take a look at the steps you need to follow.
STEP 1. Set up your work area. Make sure the area around your miter saw is clear. Then, set the piece of metal you’re going to be cutting on a stable surface.
STEP 2. Measure and mark the metal. Use a tape measure to measure the length you need to cut. Then, use a pencil to mark the cutting line on the metal.
STEP 3. Adjust the miter saw. Set the blade of the saw to the desired angle. Then, adjust the fence so that it’s in the correct position.
STEP 4. Cut the metal. Hold the piece of metal firmly in place and make the cut.
STEP 5. Repeat as necessary. If you need to make multiple cuts, adjust the miter saw as needed and continue cutting.
Conclusion
Miter saws are a great tool for cutting metal. However, it’s important to choose the right blade and take safety precautions. With a little practice, you’ll be cutting metal like a pro in no time.
In the guide, we covered the basics of cutting metal with a miter saw. We also discussed how to choose the right blade and take safety precautions. Finally, we provided a step-by-step guide on how to cut metal. If you have any questions about cutting metal with a miter saw, feel free to leave a comment below. We will try our best to answer your questions.

I am William Anderson and I’m the founder of this website. I started this site because I was tired of dealing with the problems that come with using Saw Tools. I wanted to help others avoid the time and frustration I had, So I started this site based on my own experience and what I’ve learned from other professionals and resources.
